I’m going to start off by saying that THIS IS NOT MY DESIGN. I found this design somewhere online about 8-10 years ago when I was in high school. I tried to look it up a few years ago, to try and remember how to make it, but I couldn’t find a tutorial for it anywhere. Luckily, with a bit of fiddling, I ended up remembering how to make it. I also tried to look it up again a couple of weeks ago and still couldn’t find it. This design seems to have just disappeared from the internet.
So, that’s why I’m here today. It’s a simple design (initially intended to be a bauble, I think) and works very well as a disposable cat toy. Seriously, I used to make these out of post-it notes for kittens to play with when I worked at the vets, and they loved them. This ball is light, batted with ease, and can picked up and carried (or thrown) by the mouth of a playful kitten. The reason I even tried to look it up again recently was because a colleague’s daughter recently acquired a kitten – I made him a couple of the balls (which he, apparently, loved and destroyed), and was trying to find the instructions so I could send them to my colleague and their daughter so they could make more themselves.
Even if you don’t have a cat, this ball is actually quite nice just to throw and catch to yourself…or other people, I guess…if your that social. But, that’s enough waffle for now (I promise there will be more later, though). Let’s just get on with the tutorial, shall we? The ball only takes 5-10 minutes to make (once you know what to do, that is).
Instructions:
You will need 2 square pieces of paper, of the same size, for this tutorial.
Step 1:
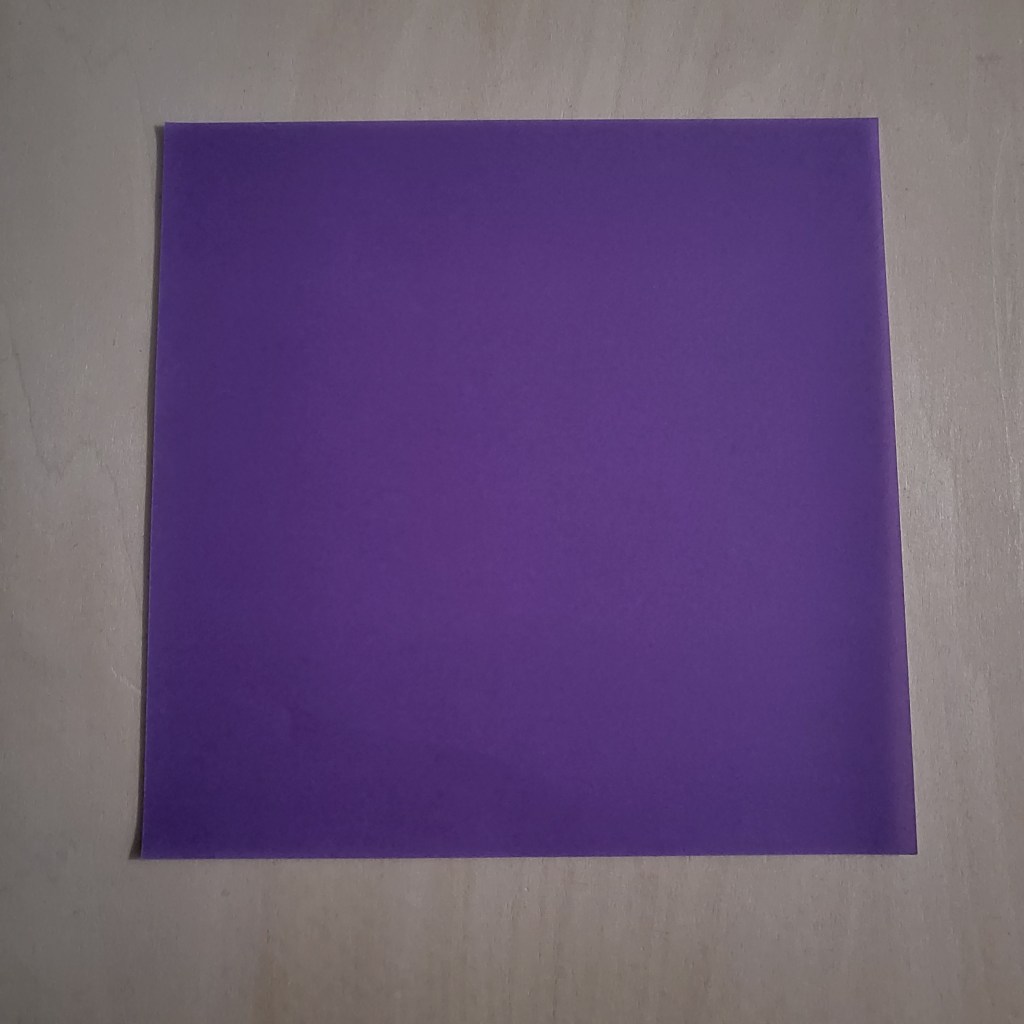
Take one square of your paper and place it flat on the table. If your paper has a different colour on each side, then have the colour that you want your ball to be facing up.
Step 2:
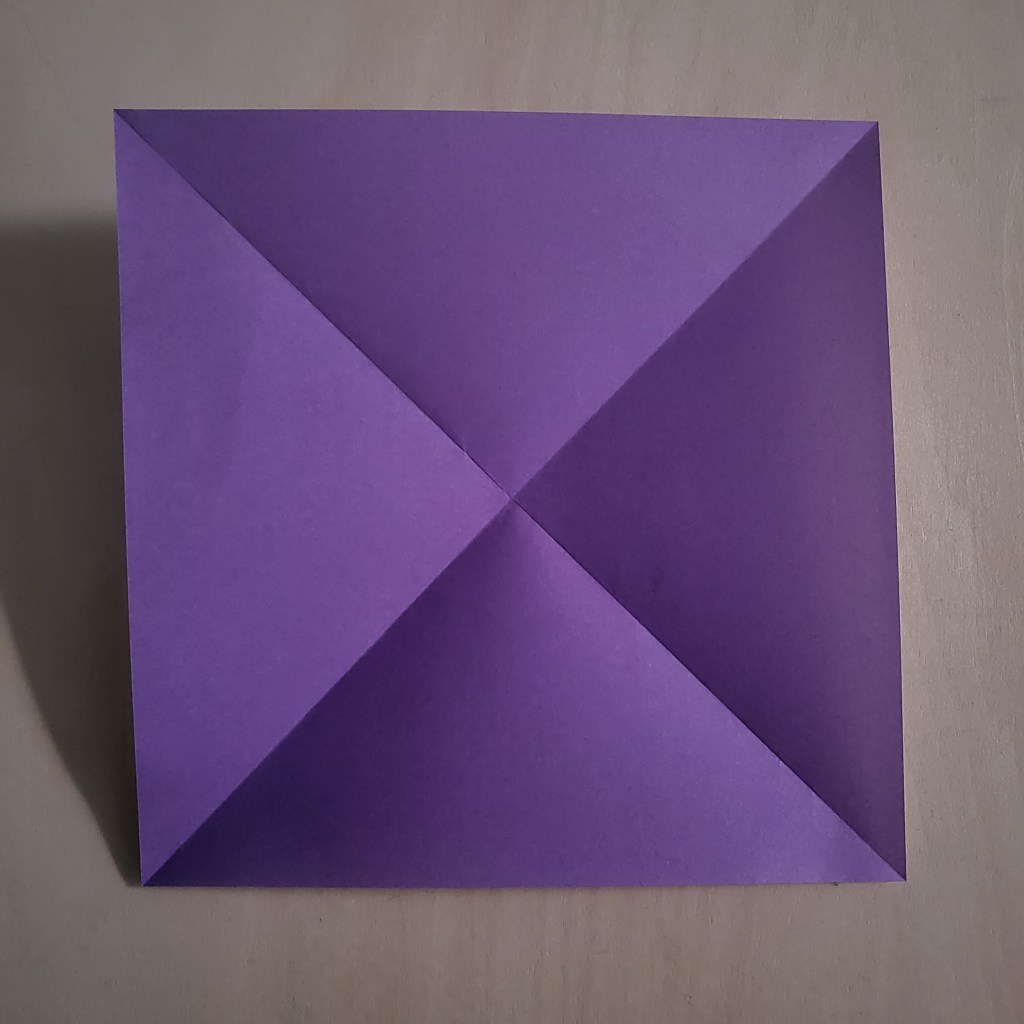
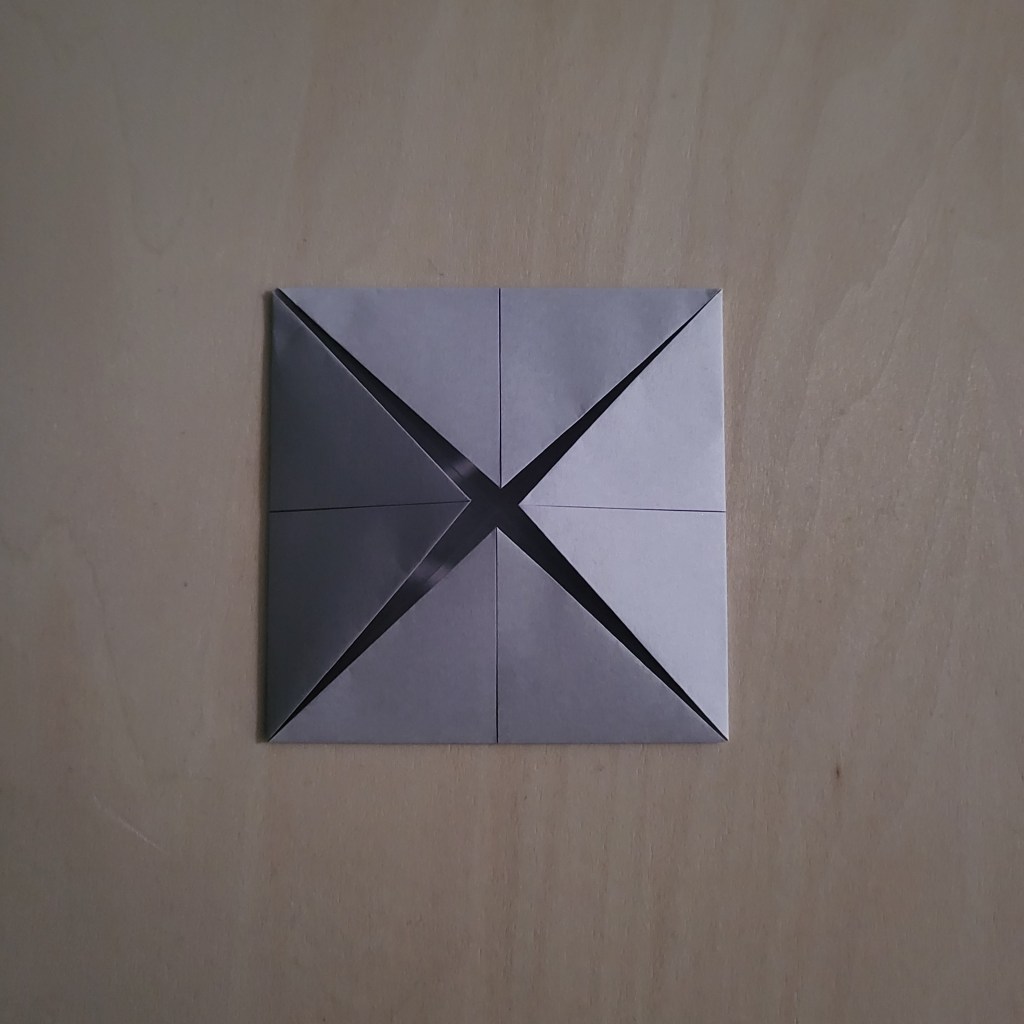
Fold your paper in half, from corner to corner, to make a triangle and then unfold it. Repeat this so that your 2 folds make an ‘X’ shape on you paper.
Step 3:
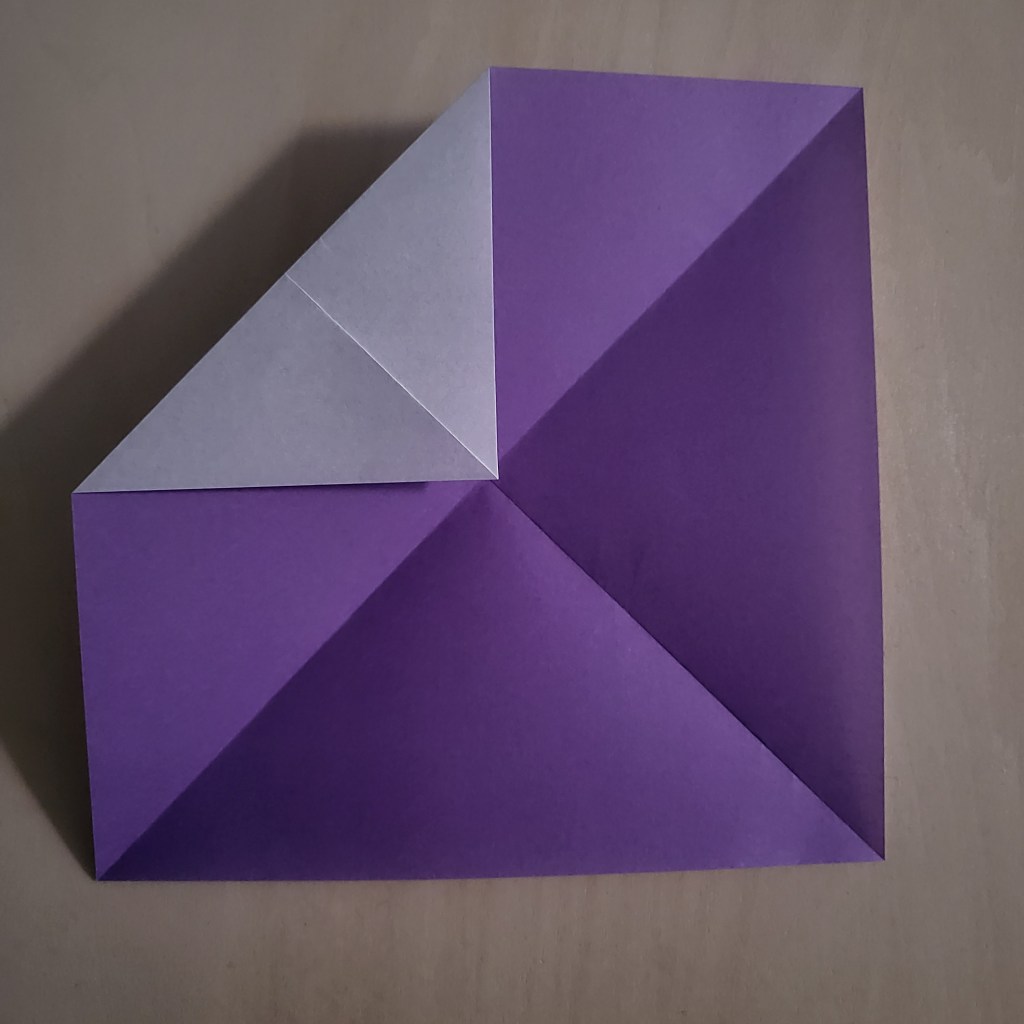
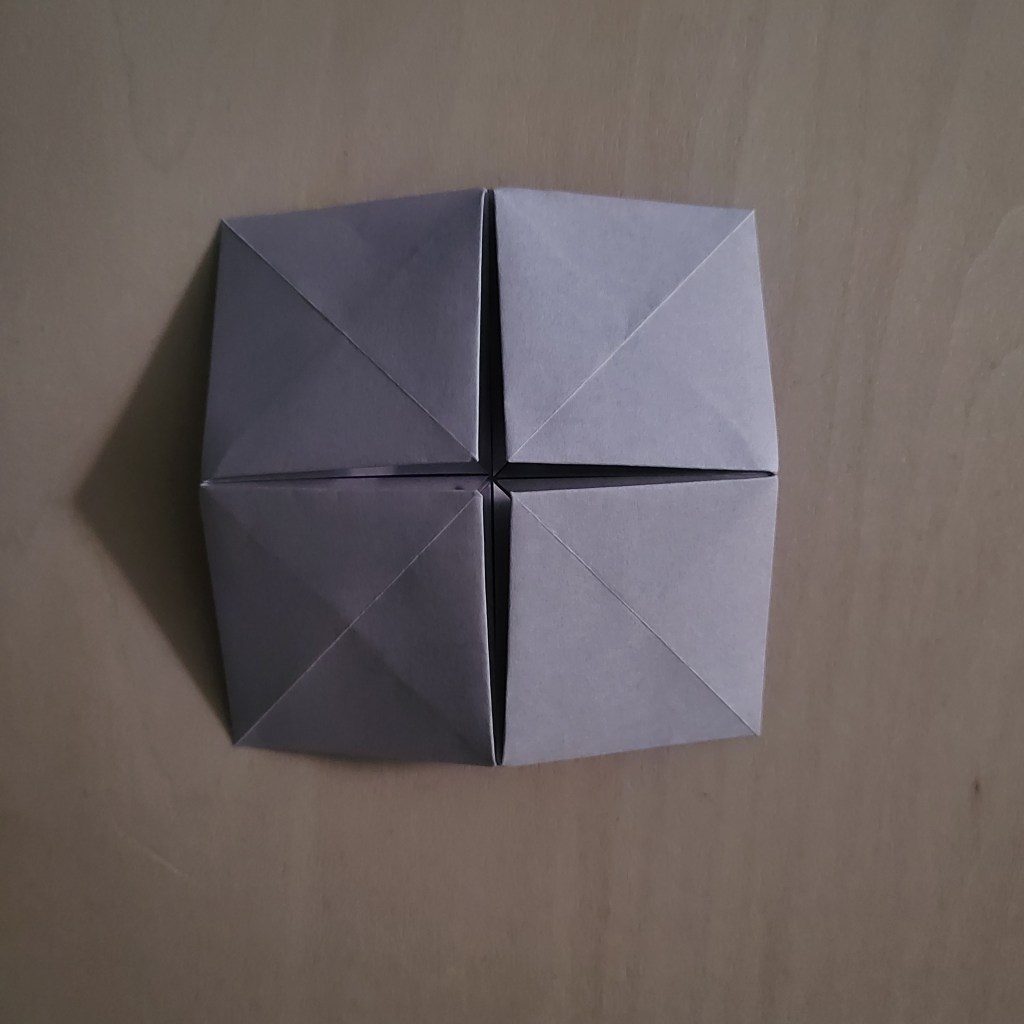
Fold the corners of your square in towards the centre, so that the corners all touch the middle of the ‘X’.

It should look like this when you are done.
Step 4:
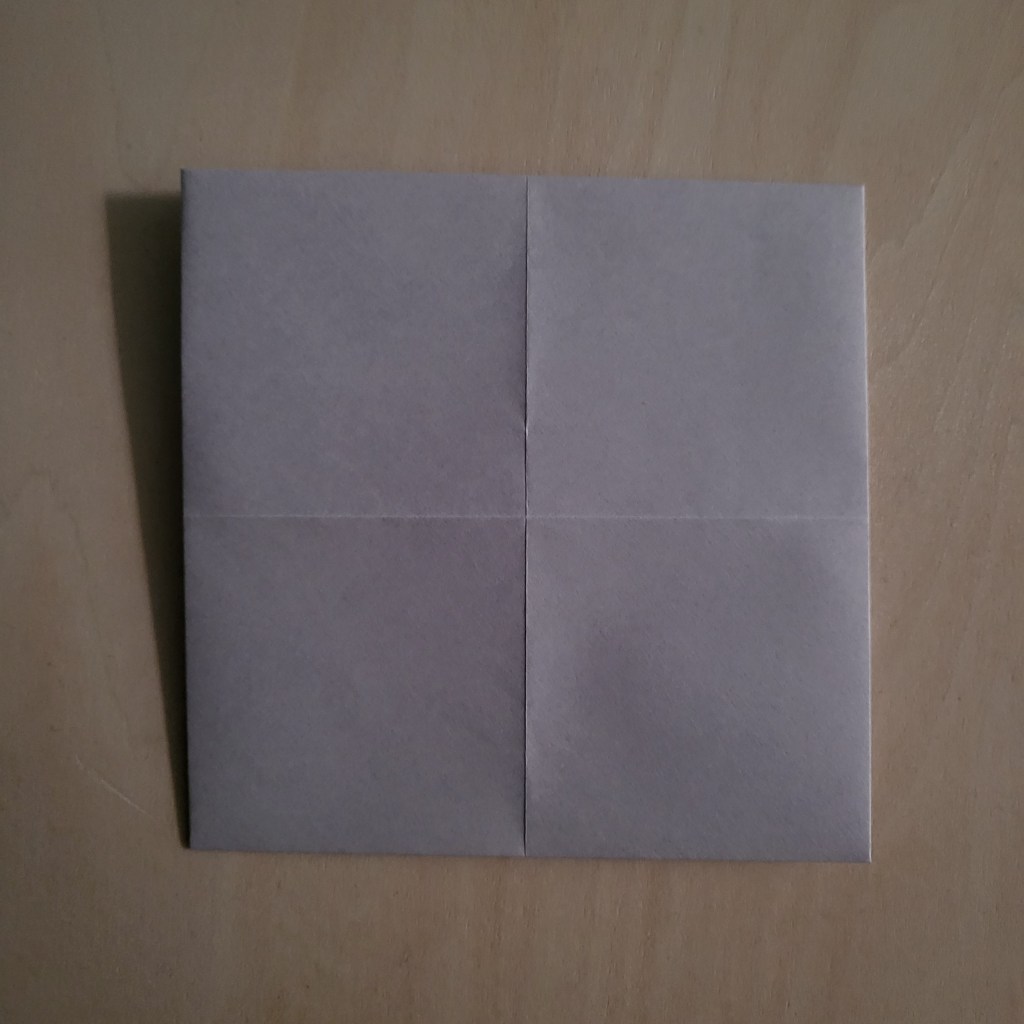
Turn your piece over.
Step 5:
Fold all of the corners in towards the centre, just like you did before.
Step 6:
You will notice that there are some flaps on the back of this piece. Fold all of the corners in towards the centre again, but do not fold the flaps at the back. Instead, let them naturally be brought to the front of the piece. If you do it correctly, you should notice that the area of the piece does not change.
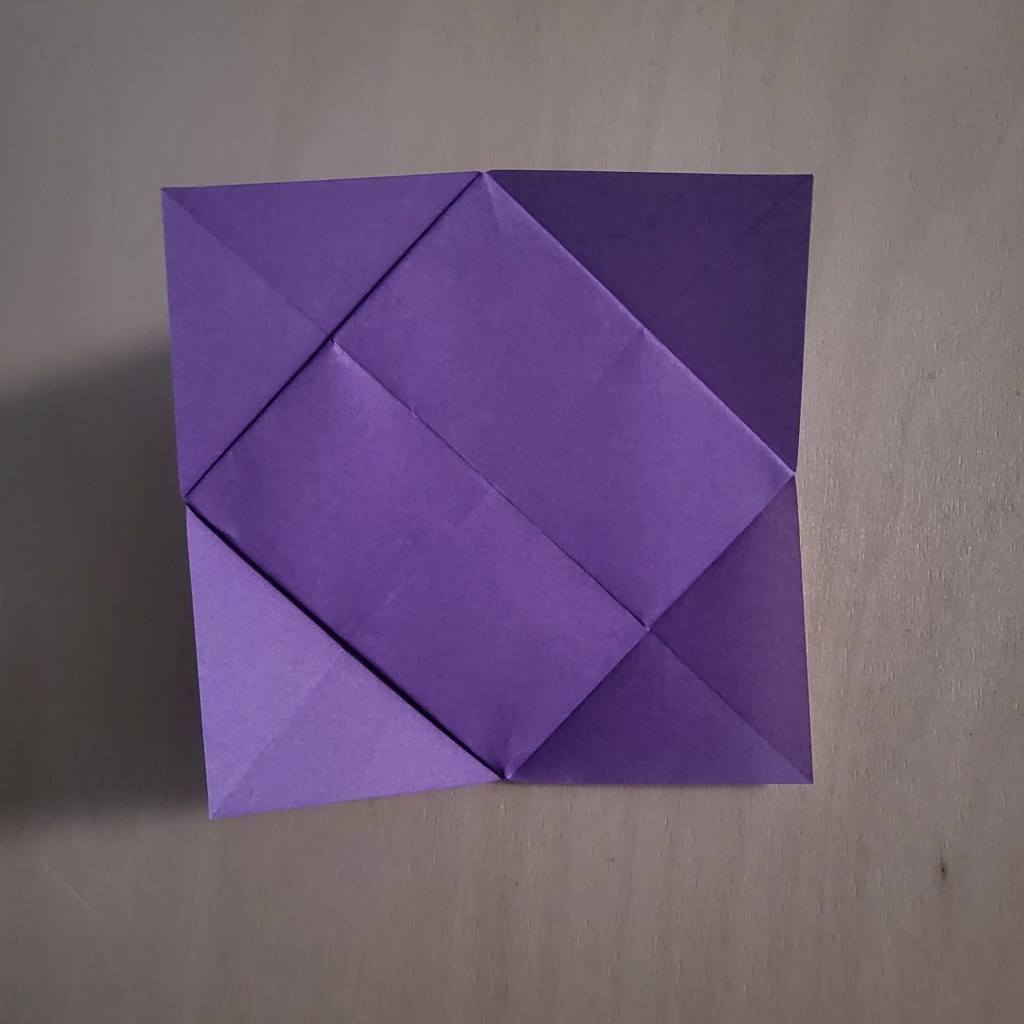
Also, if done correctly, you should notice that the back of the piece now looks like this.
Step 7:
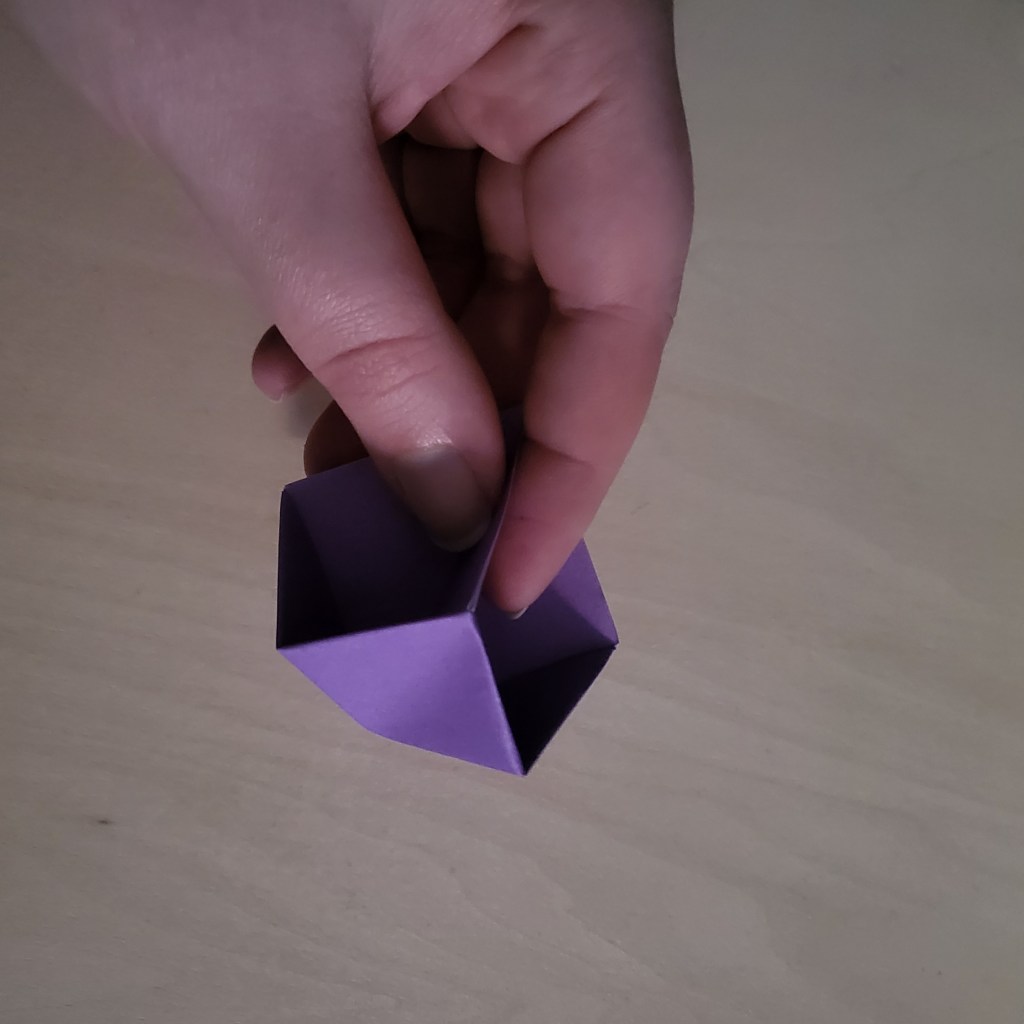
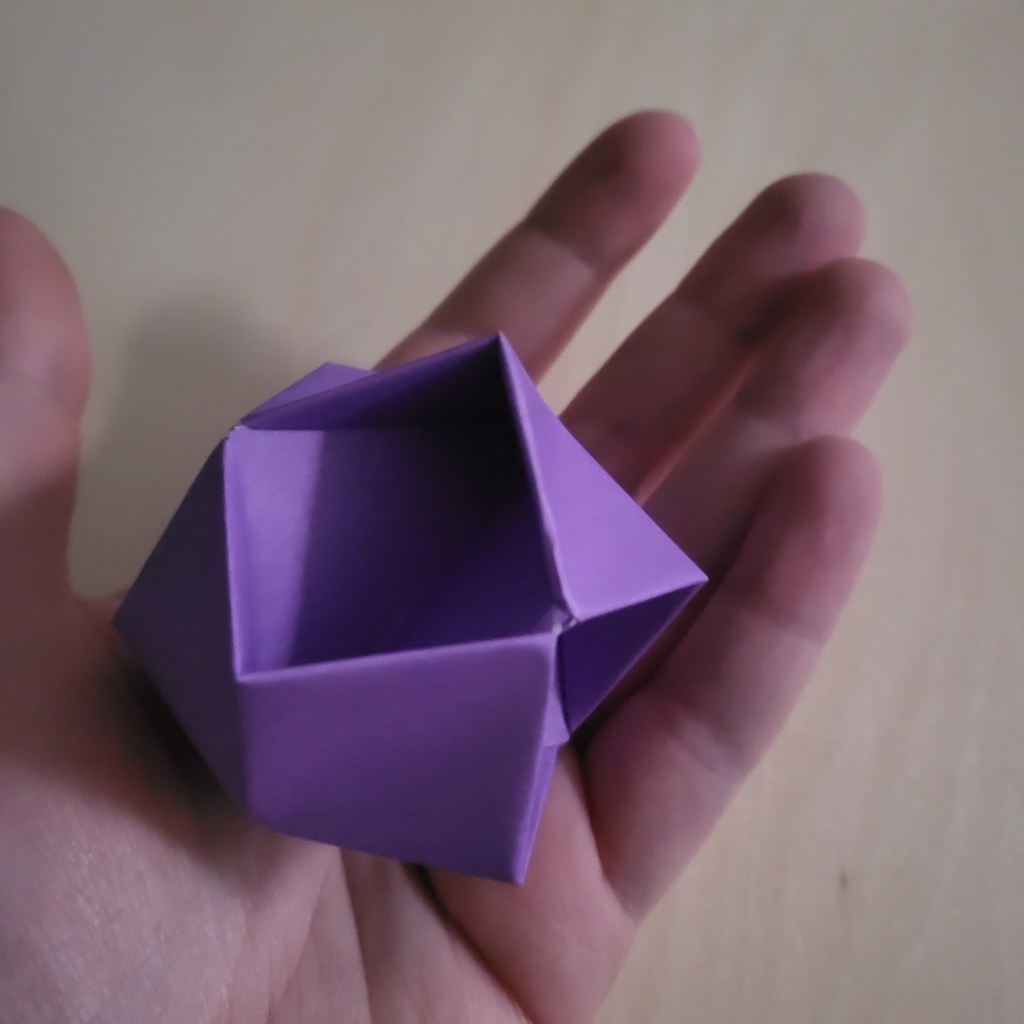
Take the corners of your piece and pinch them together, so that your piece looks like this.
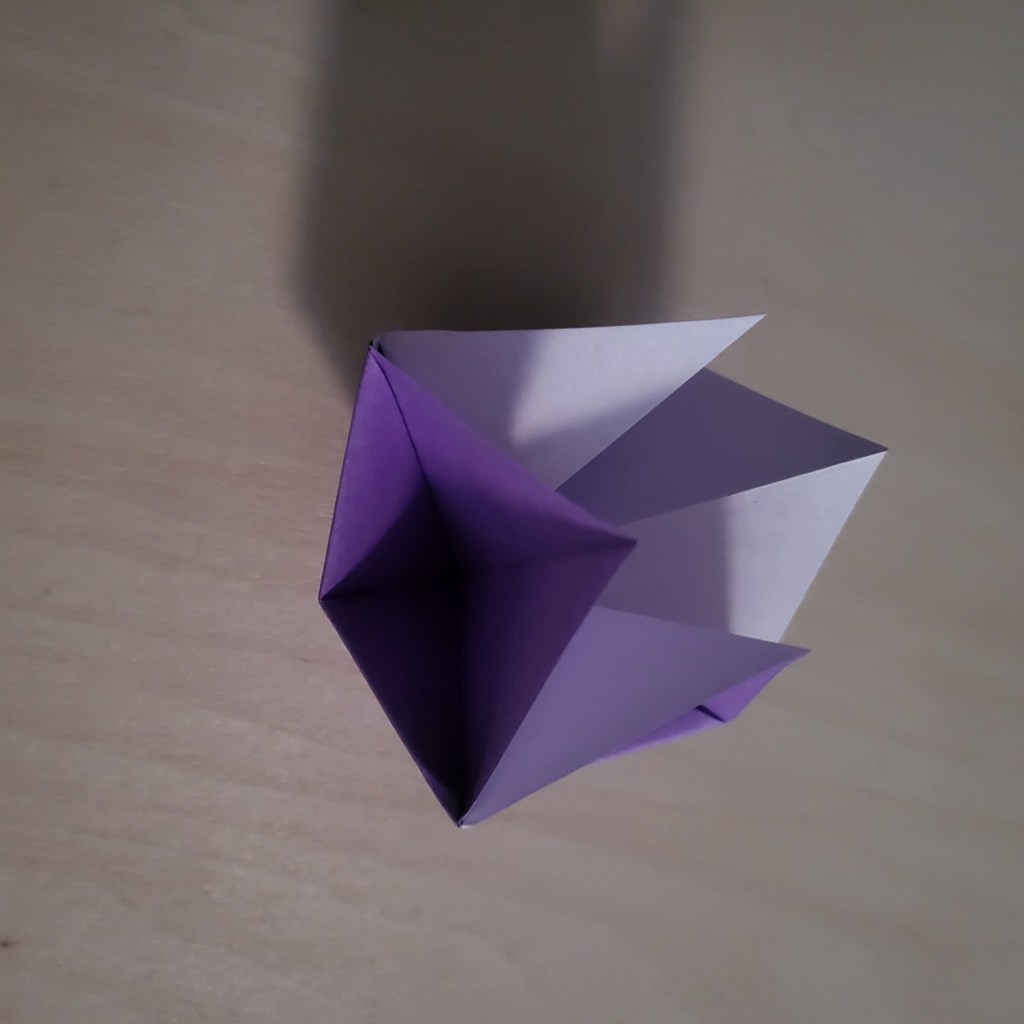
Now, if you let go, you should end up with a piece that looks like this.
Step 8:
Repeat steps 1-7 to make a second piece.
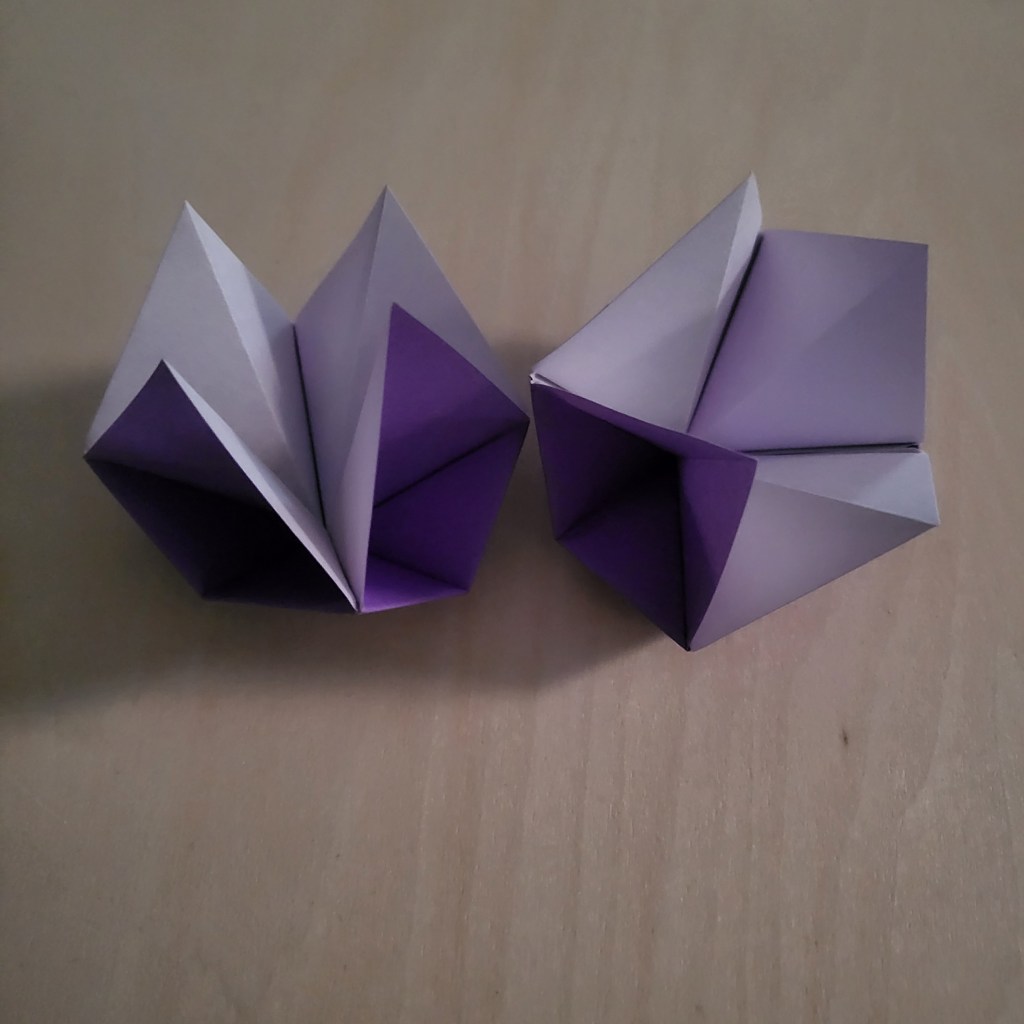
Step 9:
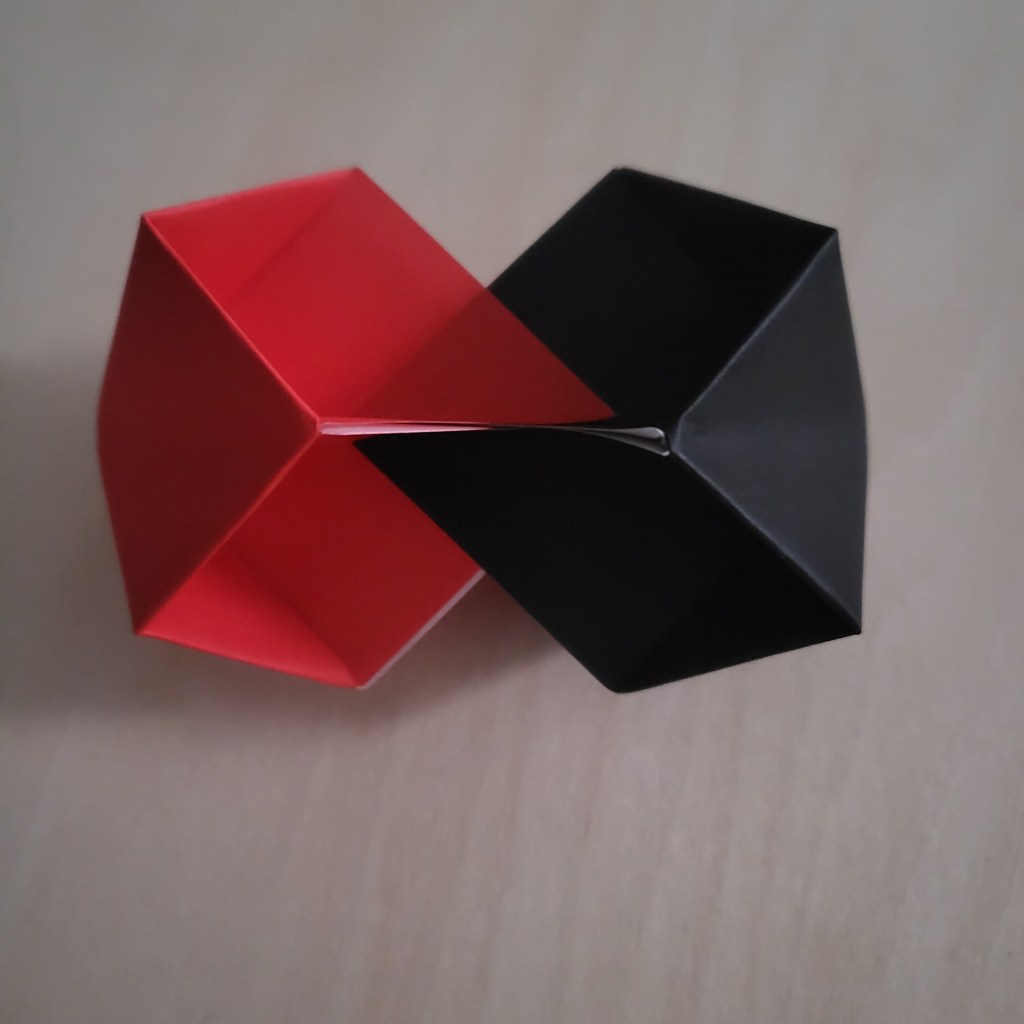
Now here comes the last (and trickiest) step. Slide the pieces together, making sure that you alternate which flaps are on top of each piece. This can be quite fiddly, but you can see this a bit better when using 2 different colours.
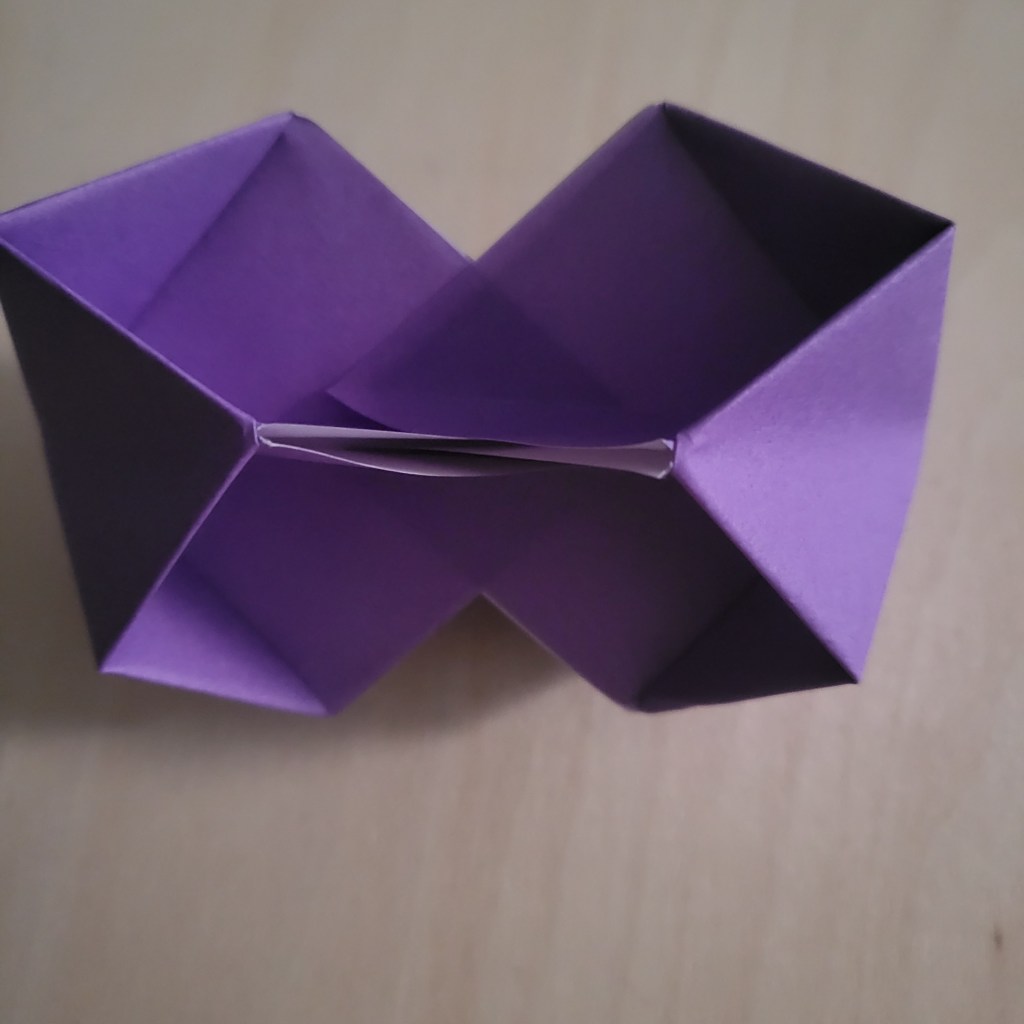
Once the pieces have been pushed together all the way, you have your finished ball! That’s it; no more instructions!
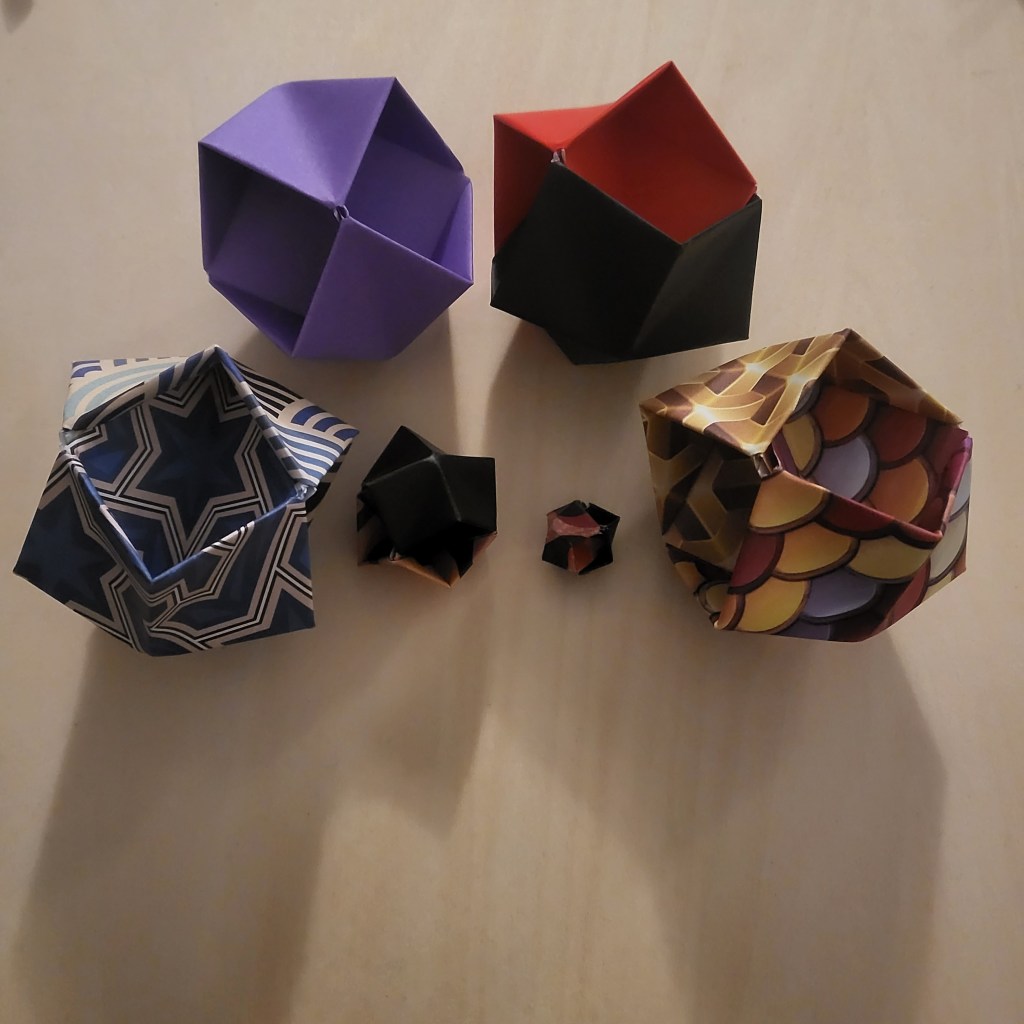
You can now play around with it a bit – make them 1 or 2 coloured, used patterned paper, or you can even make them pretty small if you want to. It’s entirely up to you.
Anyway, that’s it. It’s a pretty short one this time. I can add in some fun facts about this post, though:
- I do not have any wooden floors, tables, or chairs. All of the pictures for these instructions were taken on top of my flower press.
- The kitten that my colleague’s daughter acquired was handed to her as if it were a drug deal. She got called up by one of her friends asking if she wanted a kitten, she said yes, and then a stranger drove up to her house, handed the kitten to her through the car window (after taking her money), and then drove off again.
- Can confirm, the kitten is rather cute…and, apparently, a complete maniac.
And, last but not least, here is some music for you – Return of the Kingdom of Fife by Gloryhammer
