So, it was my birthday recently and I decided to treat myself to some more resin and some new moulds. I also decided that I would do some experimenting…
This is the result of an afternoon of experimentation.
And, yes, I know what you’re thinking – ‘You were working with resin on carpet? In your RENTED flat!?’ Yes. Yes I was. Clearly, I’m living life on the edge.
The next day:
After successfully demoulding everything, about 6 hours earlier than I should have (because I am impatient), this is what I ended up with.
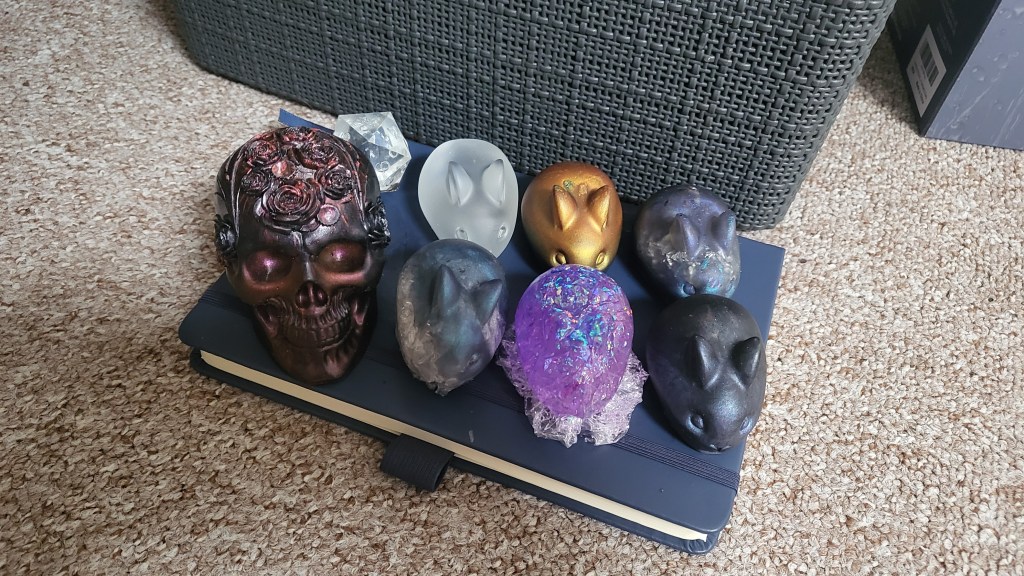
The overall result was kinda mixed. Some things worked out surprisingly well and some other things really didn’t. But that’s the point of experimenting – to see if things work or not. Not everything does but, you know what, life would be boring if it did.
So let’s go through things, shall we?
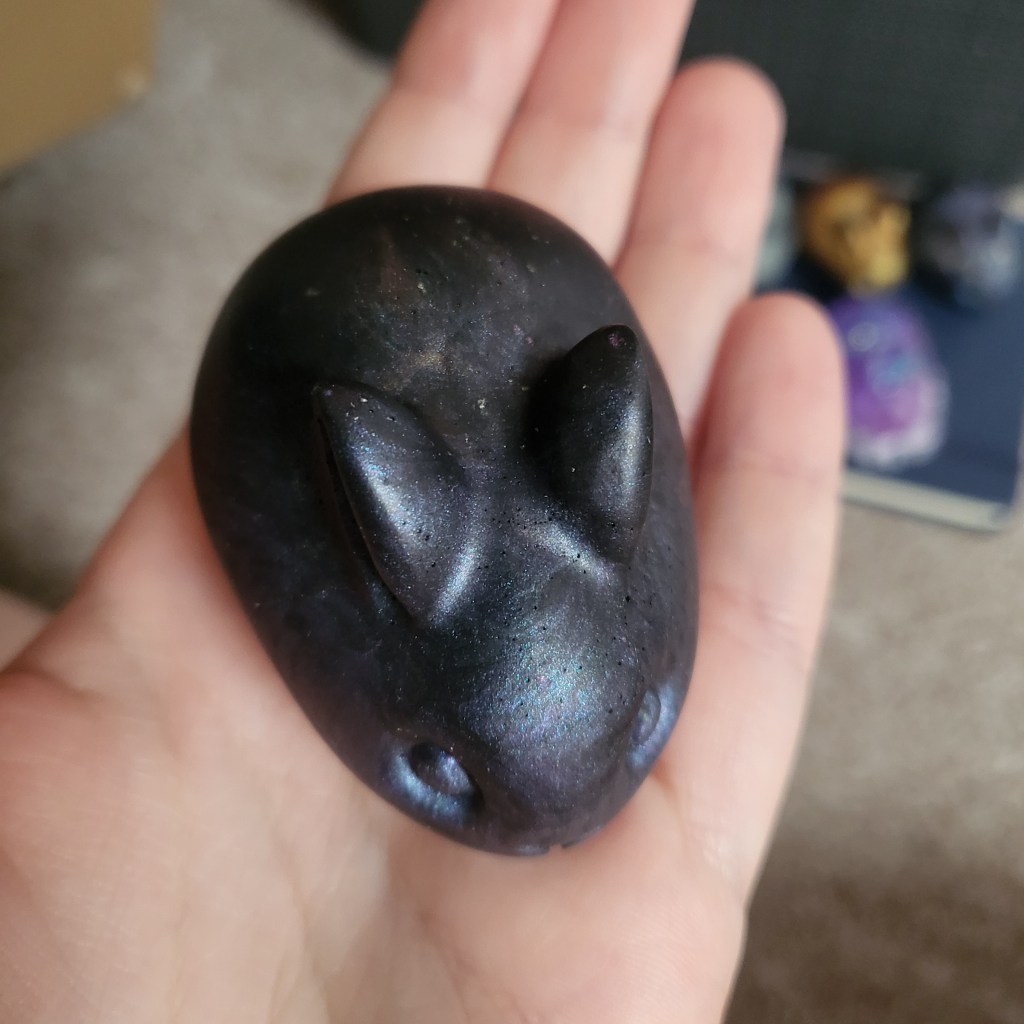
#1 – The slightly squishy bun:
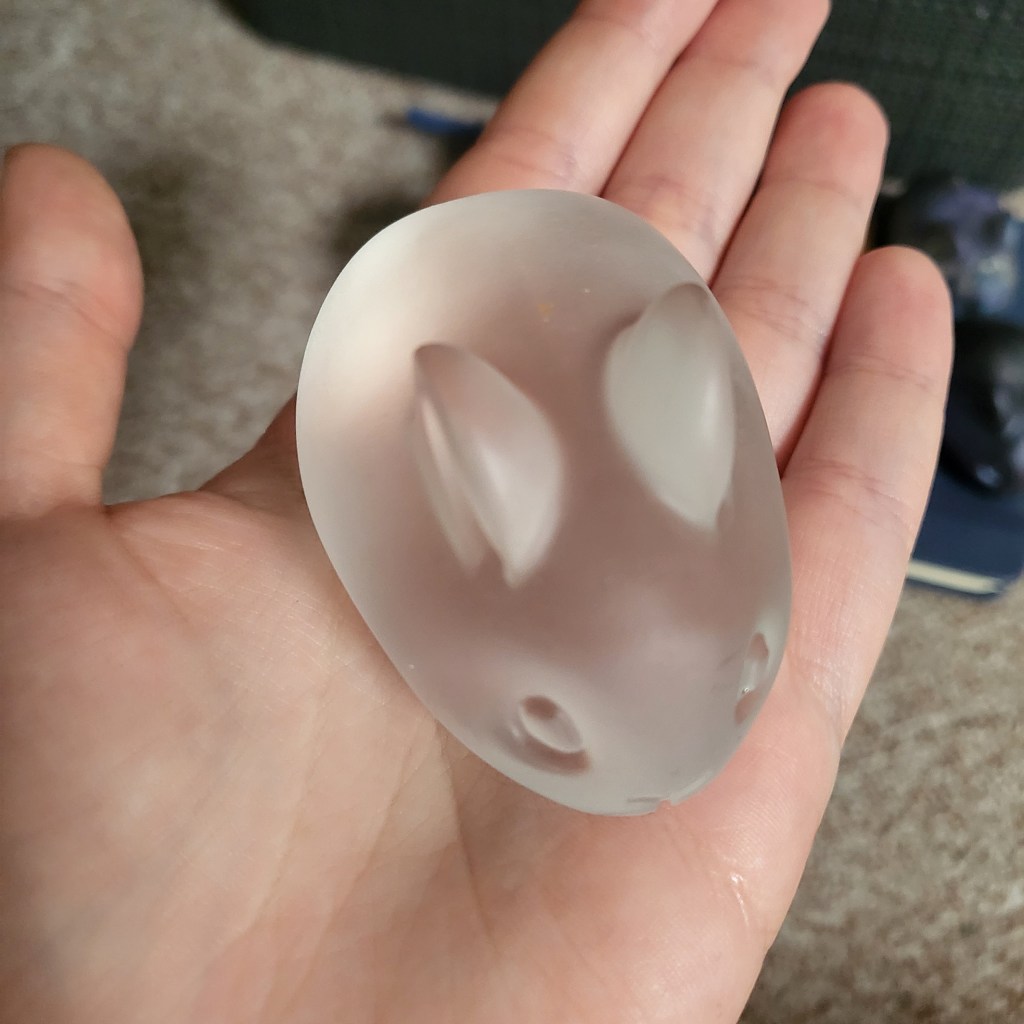
This one was, by far, my biggest success of the day. Just look at him! Isn’t he just perfect?
Anyway, fawning aside, let’s talk about why he exists. The idea for him came from a mistake that I made on another resin project (which I’m sure that I’ll talk about at a later date) where some of the resin in one of the pieces ended up being squishy after fully curing. It confused me at the time but I ended up liking the result. I decided that I wanted to try replicating the texture and came up with 2 ways in which the squishy-ness could have happened – either I didn’t use enough hardener or there was too much moisture. So, for this bunny, I decided to use less hardener than advised. I also decided to not add anything else into the resin just in case that made a difference.
There were 2 possible outcomes for this bunny – either it turned out slightly squishy, as intended, or it would never fully cure. Thankfully, the former happened and I now have slightly squishy, and not sticky, bunny (as seen in the picture above). He kind of feels a bit like a stale winegum.
Although this bunny turned out really well, I’m not exactly sure why he ended up having a bit of a frosted look to him. All of the rabbits did, actually. I can only assume that it was due to the moulds, as I made a D20 with the leftover squishy resin and that turned out as clear expected. Bit weird, but he looks cute (so I don’t mind too much).
#2 – The two-coloured bun:
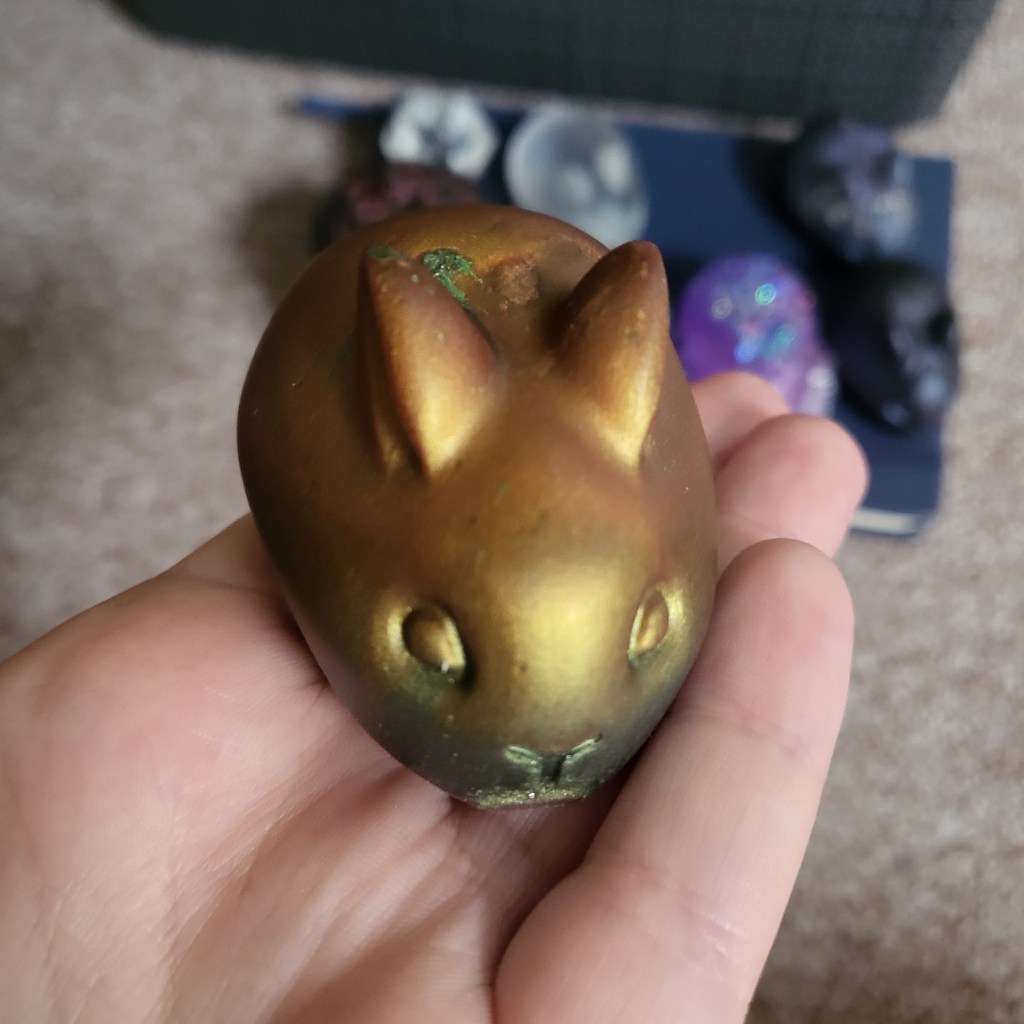
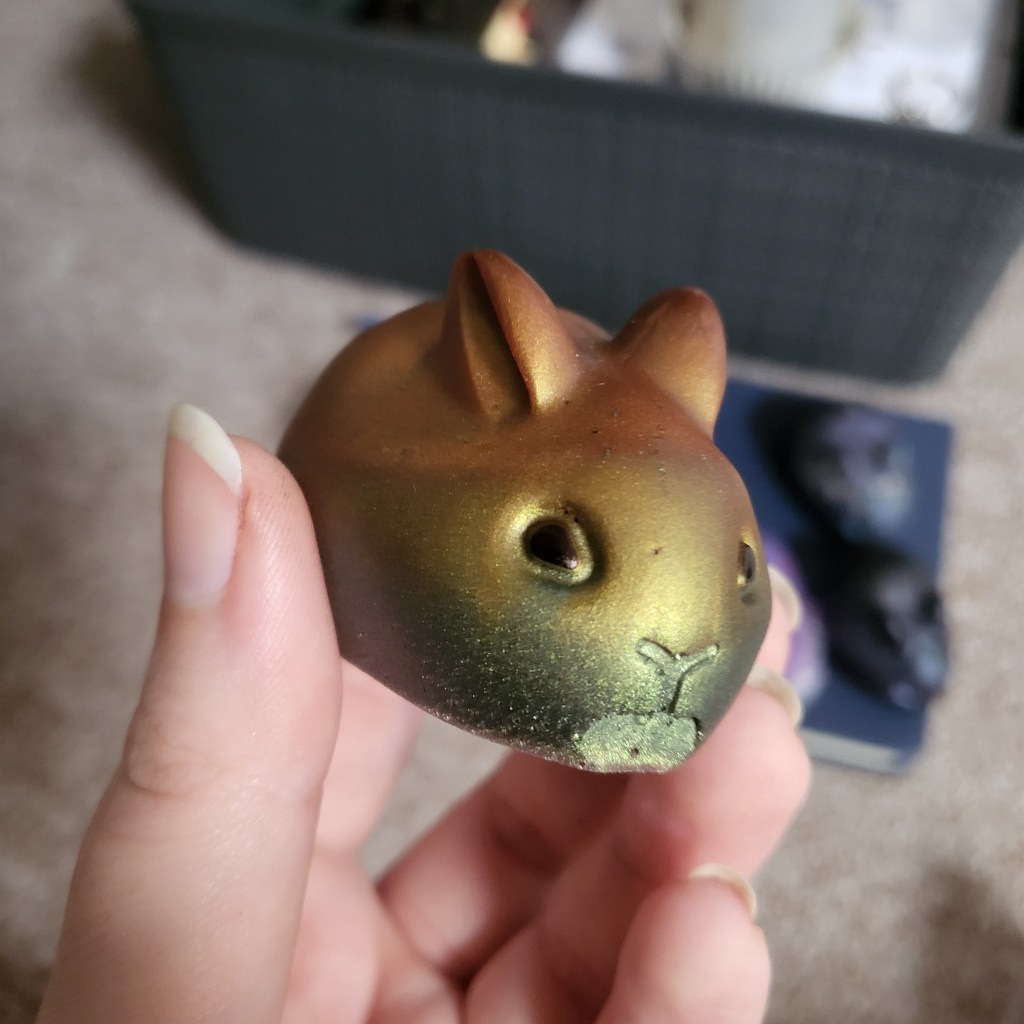
I’m cheating a little bit with this one as it’s technically not an experiment (I have done this technique a few times before) but you can still argue that I was testing out the moulds…so I’m still including it.
For this bunny, I divided the resin into 2 parts and coloured one with a gold mica and one with a green mica. I then poured the gold part into the mould first, followed by the green part. This resulted in a 2-coloured rabbit. I then coloured in its eyes with a black sharpie – just to see what it would look like.
Overall, this one didn’t turn out too bad. She’s a bit bubbly at the bottom and I kinda wish that I could have swirled the colours a bit more, but colouring the eyes was definitely a good choice. Again, not too bad.
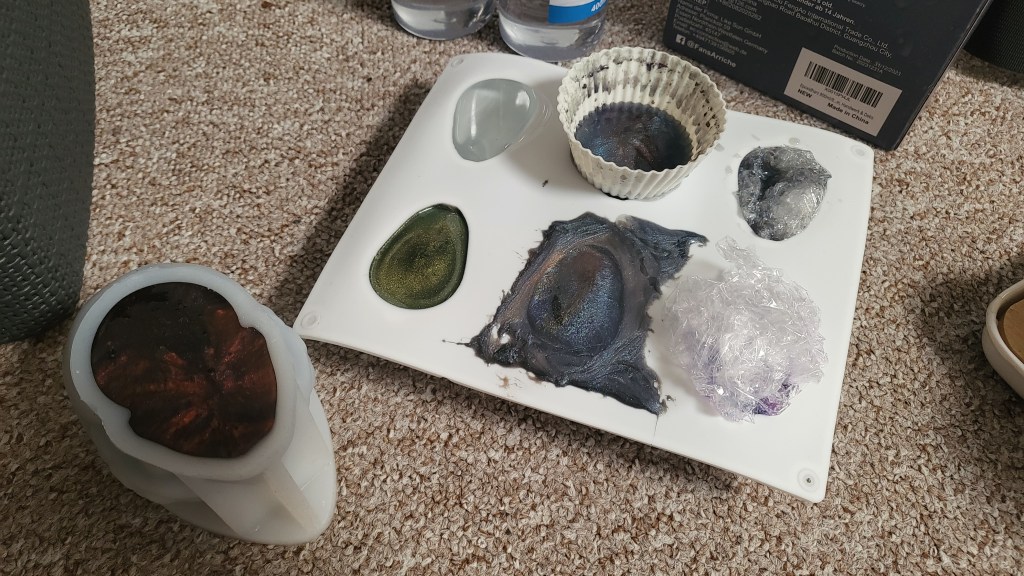
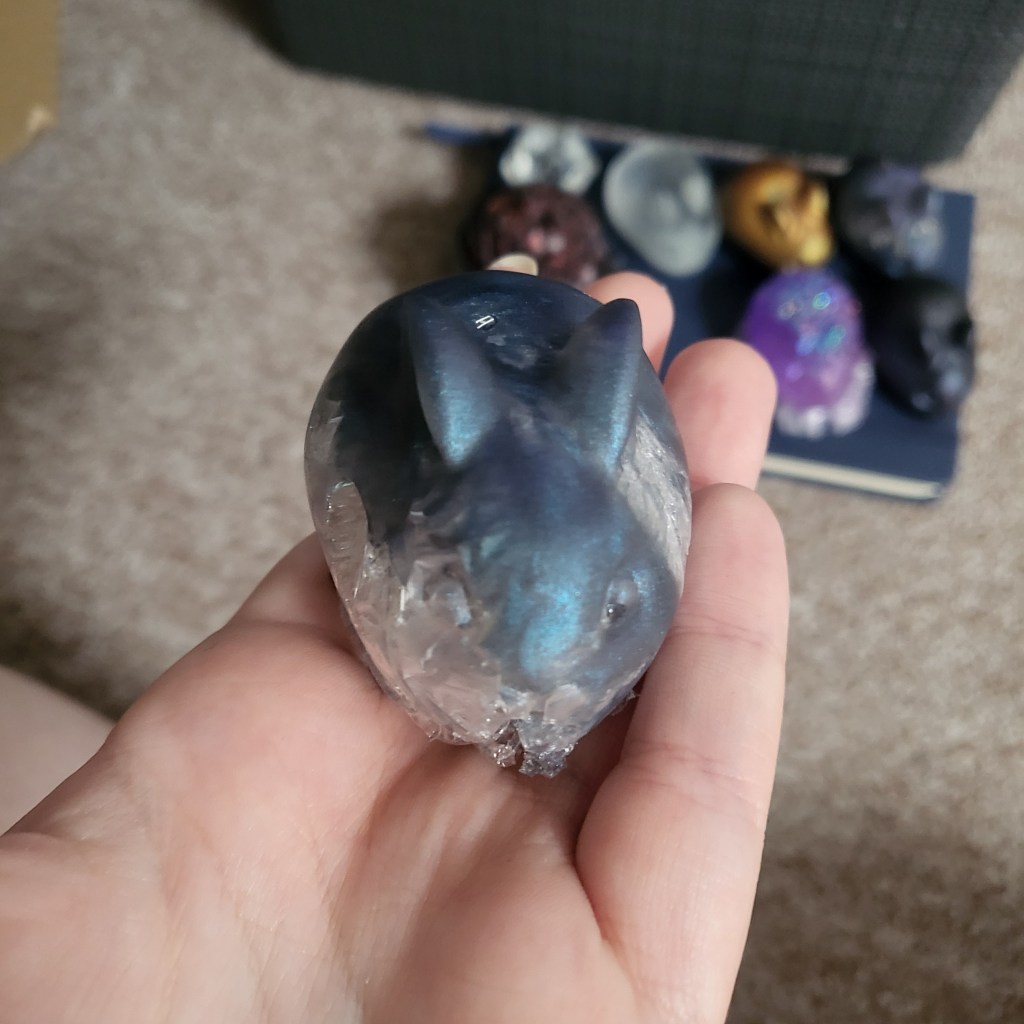
#3 – The one that consumed foil:
This was the one where I had to weigh it down with a silicone cupcake liner (that had some leftover resin in it). This was because the tin foil inside on him had air trapped in it, causing it to keep floating out of the bunny…which was not ideal.
This bunny ended up have a couple of different elements to it. The first one was, obviously, the rebellious tin foil stuffed inside. The second was the lightly-coloured resin. I only added a very small amount of mica to the resin as wanted to make sure that the foil could shine through. I actually ended up using 2 colours of resin, in the end – two different shades of blue. This purely because I didn’t make enough of the dark blue resin to fill the mould and I had planned to use a similar light blue resin to fill up the next mould. Hence, the 2 blues.
While I don’t think this bunny turned out the best, I still think this technique has potential. I think that using the foil could look really good with resin of a similar translucency but without the frosted look. I now kinda want to try and make a set of dice with tin foil in…
#4 – The one that consumed cling film:
My first thought when I demoulded this one was that he kinda looks like he’s dying…Yeah, probably not the best first impression to have, but oh well.
For this rabbit, I used a lightly-coloured blue resin and a ball of cling film. The cling film, much like the tin foil, had a lot of air trapped in it and did start floating out of the mould. Unlike the foil, though, the cling film did not need to be weighed down.
I genuinely wasn’t sure how this one would turn out. I just wanted to see what would happen. It didn’t turn great and, should I try using cling film in resin again, I think there is a better way to go about things. I think if you coat the cling film in resin before screwing it up you might end up getting a better result. There is chance, however, that doing this may result in the cling film disappearing completely within the resin. But, I don’t know. I might try doing this again at some point.
#5 – The one that was consumed by cling film:
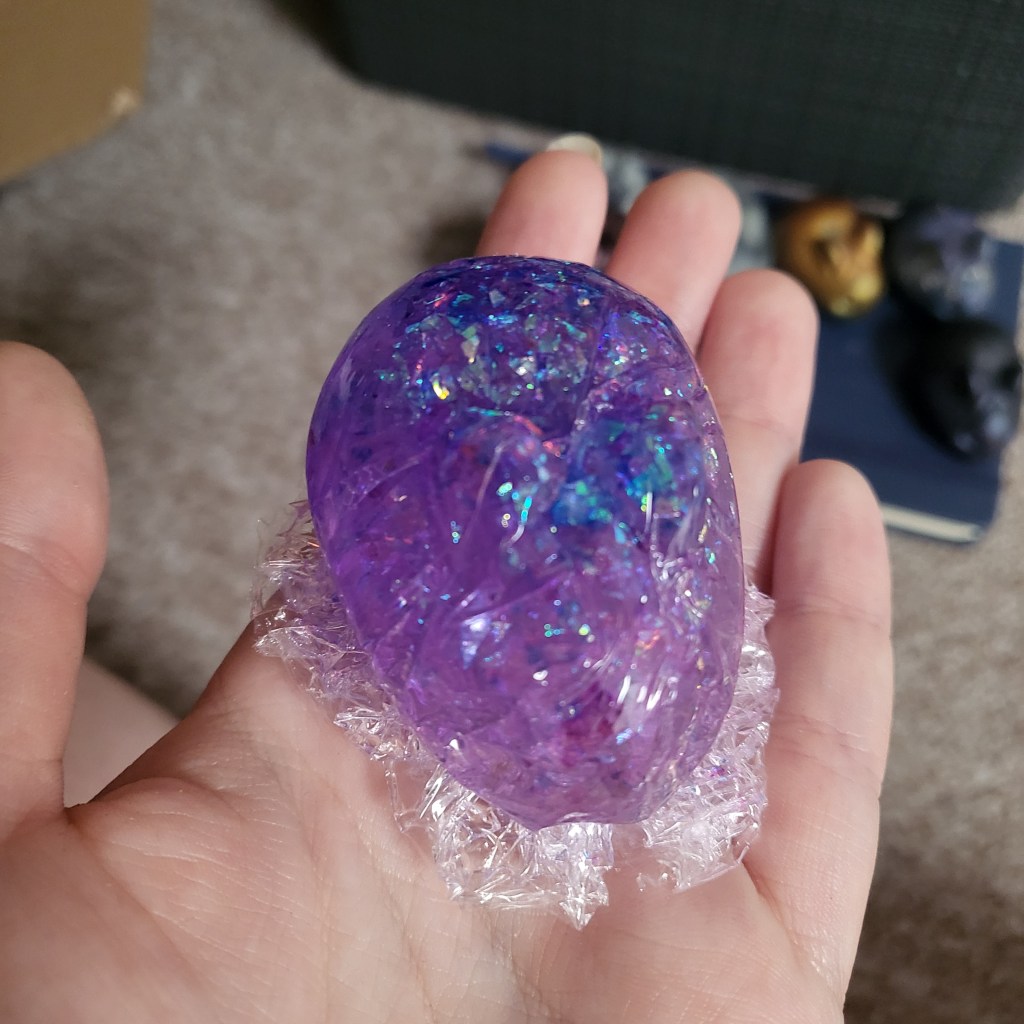
I don’t have to tell you that this one didn’t quite turn out as planned.
The idea behind this one was that I would put some cling film inside of the mould in order to give it a wrinckled/crinkled texture. Once this cling film was in place, I poured in some clear resin with some sparkly bits mixed in, and crumpled the excess cling film over the bunny’s base. The idea then was, after demoulding him, I would then take off the cling film (as I have removed cling film from cured resin once before with no issue). As you can probably tell, I wasn’t able to remove the cling film…
I did learn some things from this bunny though – the sparkly bits look good (even though they sunk), the cling film underneath kind looks like he’s sat on a cloud, and that it is definatley the mould making the resin frosty.
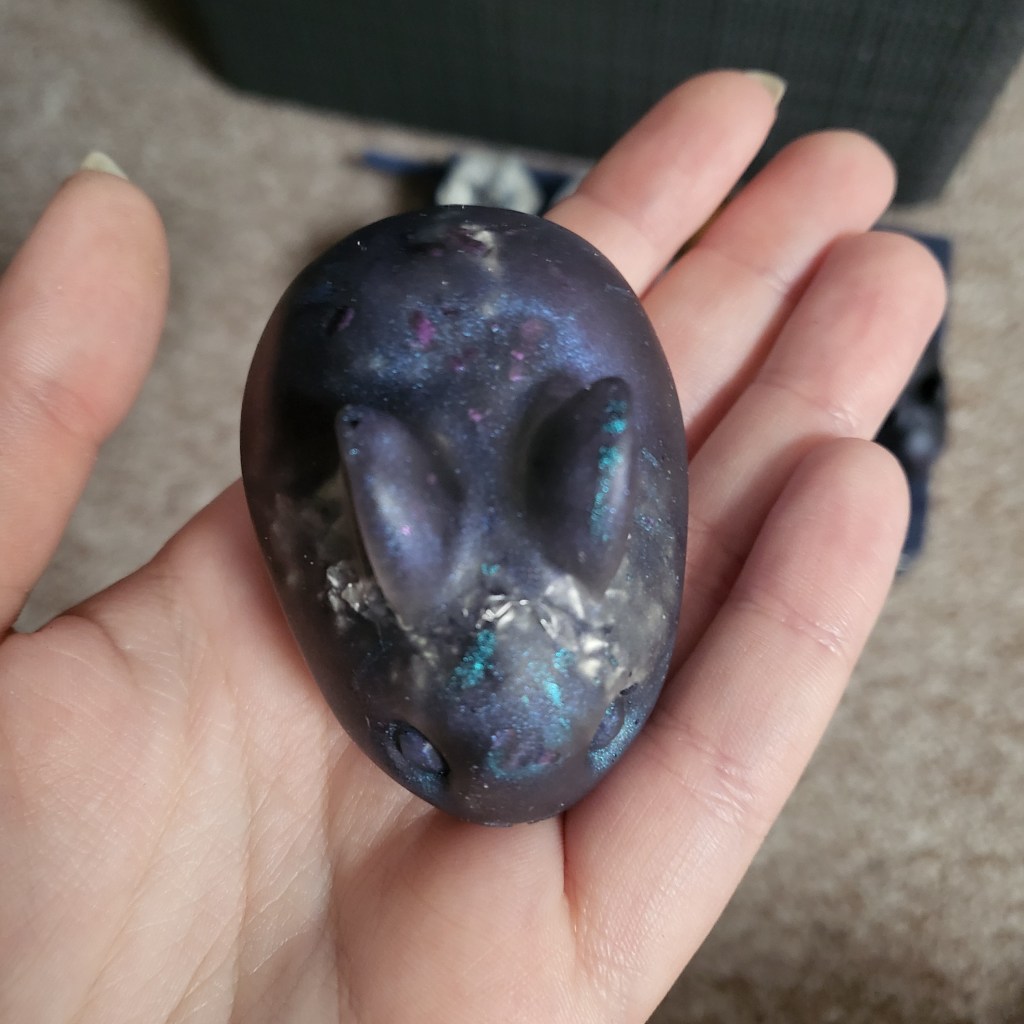
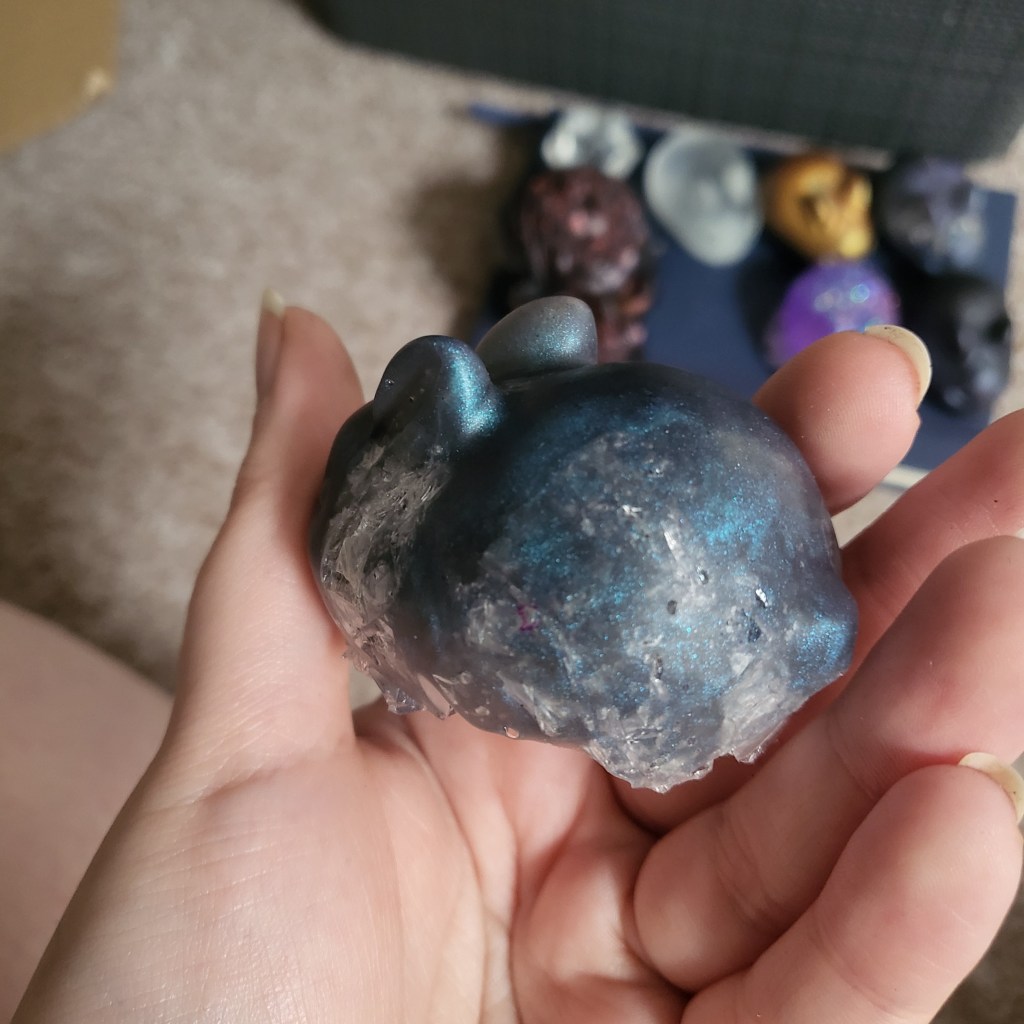
#6 – What was supposed to be the ‘ultimate dirty pour’:
I had such high hopes for this one. I was so excited to demould them. It ended up disappointing me, though.
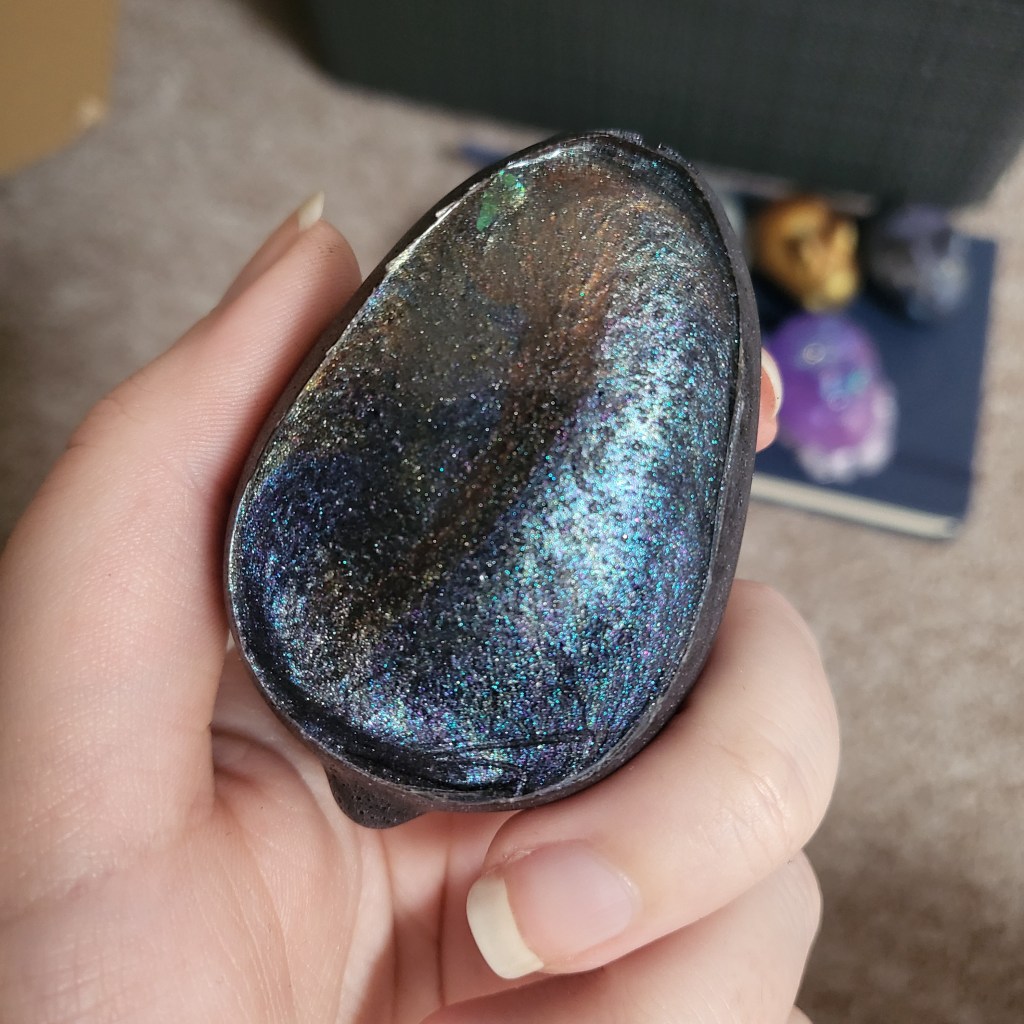
For this rabbit, I did a dirty pour with resin coloured with all 9 of my micas. It was supposed to be a beautiful mix of red, orange, gold, green, light blue, dark blue, light purple, dark purple, and black. I had hoped that they would come out looking like a swirling, sparkling oil slick. They instead ended up looking like your average night with light pollution. You can see, on the bunny’s underside, what I had hoped he would look like. Sadly, this was not the case.
This bunny still came out relatively well, though (especially when compared to some of the others). They may have came out relatively dull, compared to what I was hoping for, but the actual execution was quite good (nicely pigmented and few bubbles). Perhaps I’ll try this one again someday…after working on my technique a little bit. I had never tried a resin pour quite that ambitious before.
#7 – And, lastly, a present for a friend:

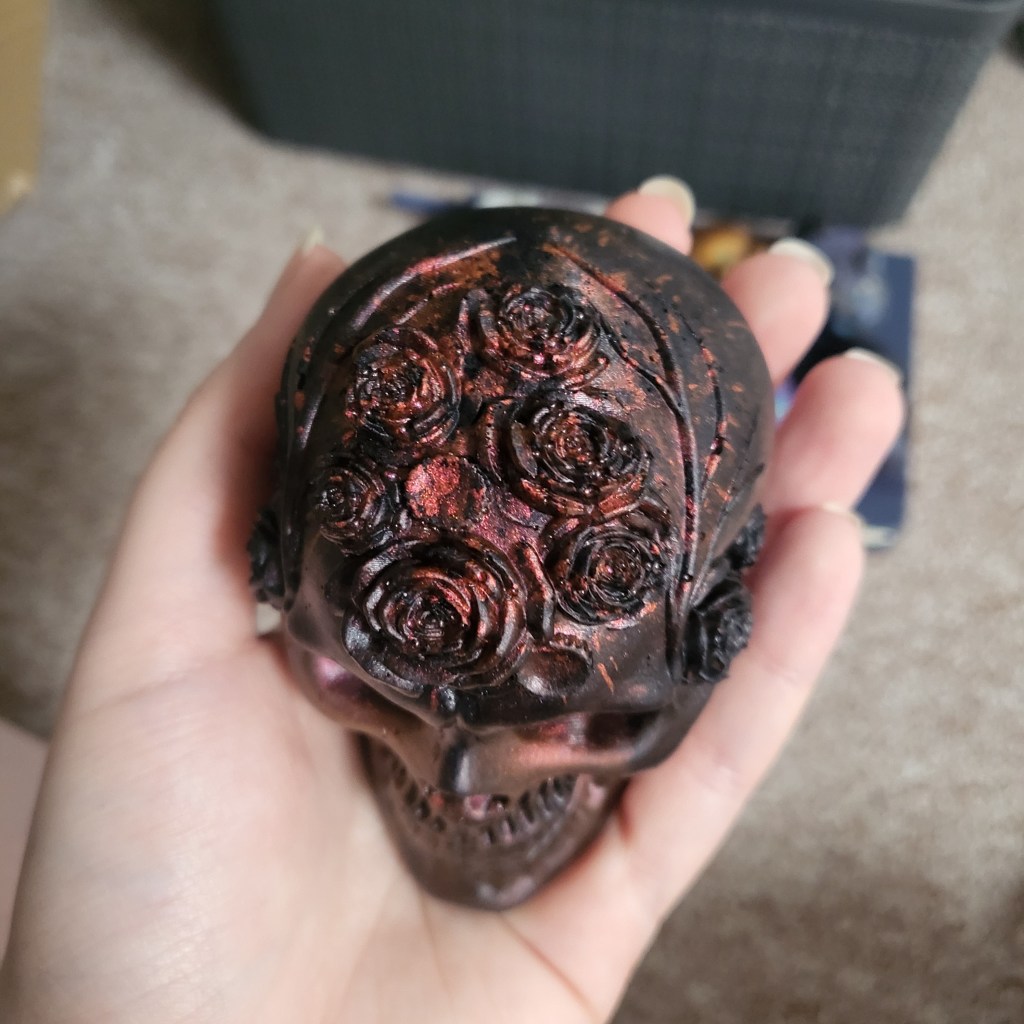
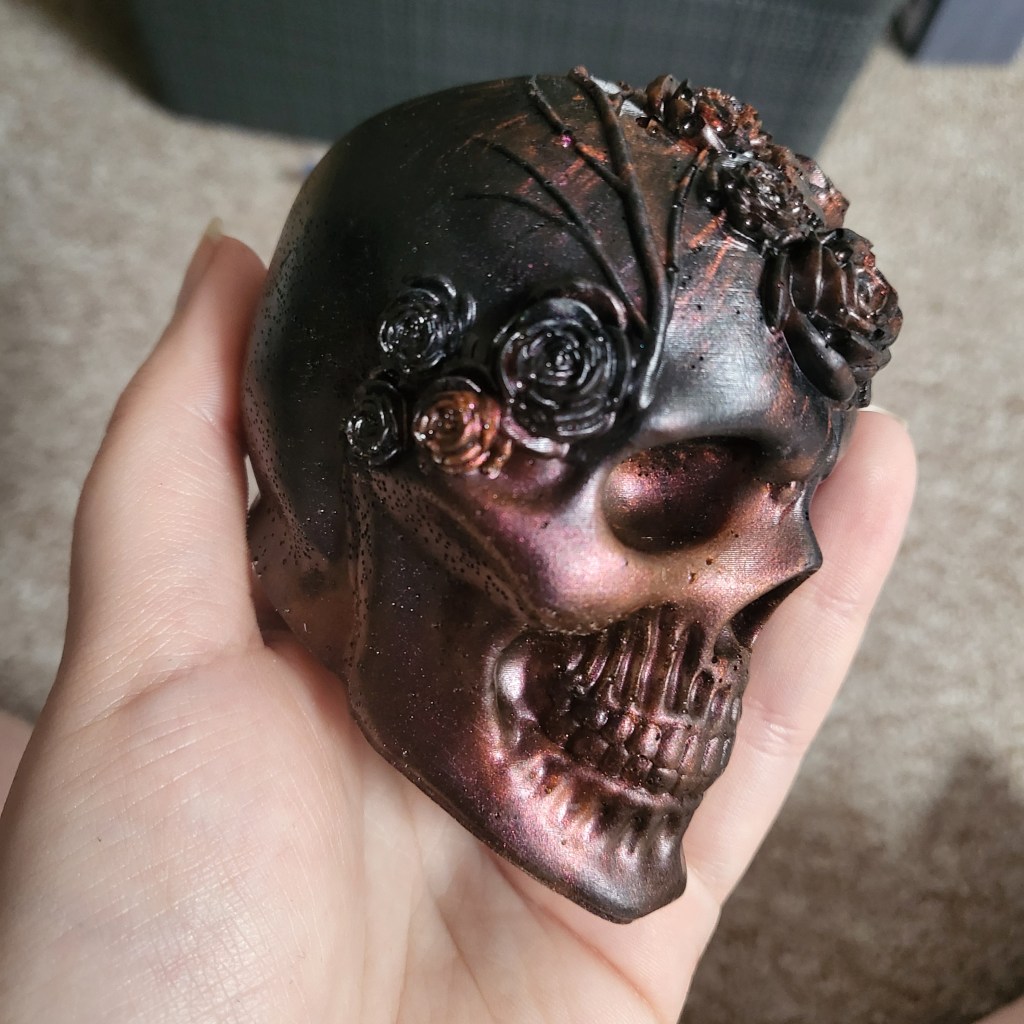
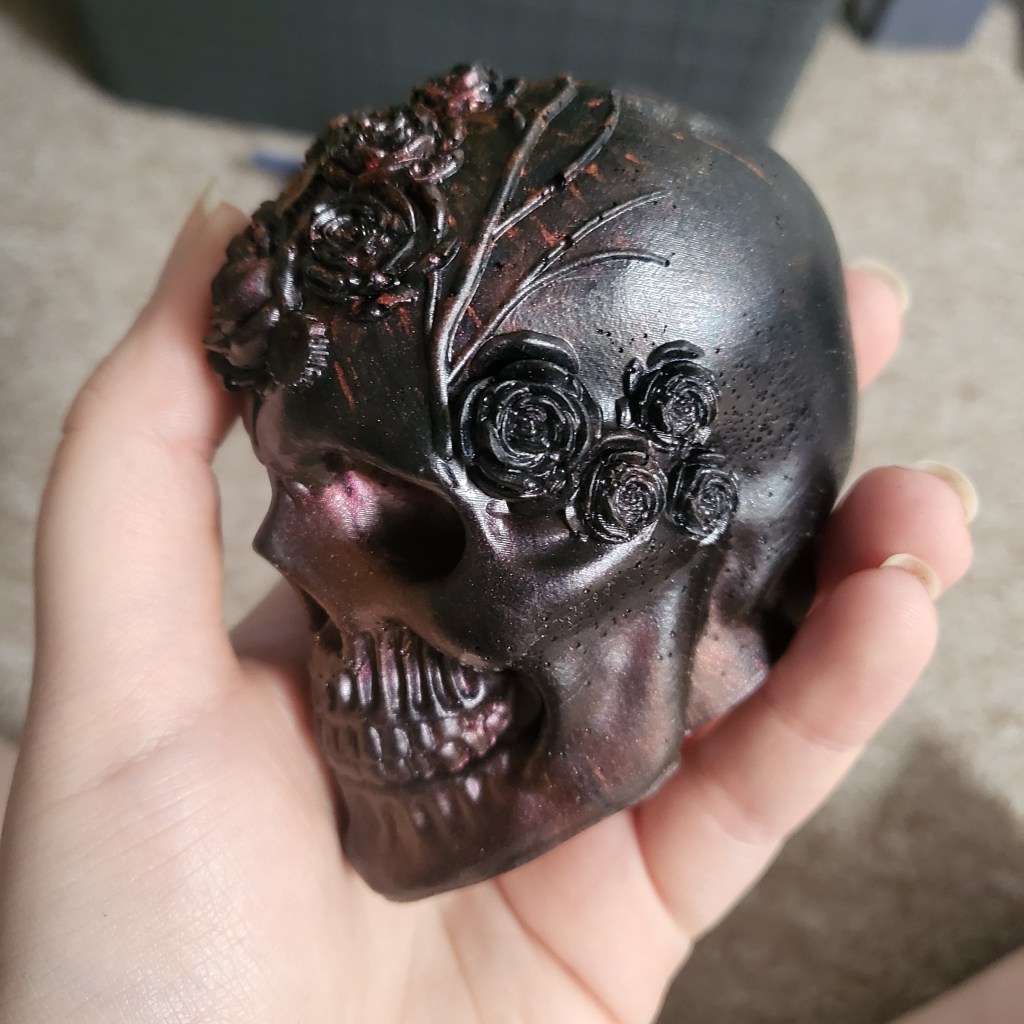
As you can (hopefully) tell, this last one is not a rabbit…sorry to disappoint you???
Anyway, this piece turned out quite well in the end. Well, well enough for me to be gifting it to someone else. For this piece, I did 2 dirty pours of resin coloured with black and red mica. Unfortunately, it ended quite bubbly in the bottom half of the skull and around the floral details. The colours in the bottom half also ended up being rather muddied. On top of that, I didn’t mix the red mica very well for the first pour and the mica ended up splattering on the top of the cranium. Even though this was yet another mistake, this is actually my favourite part of the piece.
As previously stated, I will be gifting this skull to a friend as I think that it will be a good fit for her living room. For a little bit of context – she is a goth and has the plan to have a witchy themed living room. I’ll be visiting her at the end of next month for her birthday, and she will be receiving this skull among a few other things for said living room. I know she won’t read this post as she doesn’t even know this blog exists…even if I technically started it while I was still living with her. Thankfully, this means that I don’t have to sit on this post for a month before making it go live.
Okay, it’s music time! Today, I am recommending an old favourite of mine. The reason that I chose this particular album today is because the bunnies that consumed things reminded me of this album’s cover. So, here it is – Beware – Little Red Lung
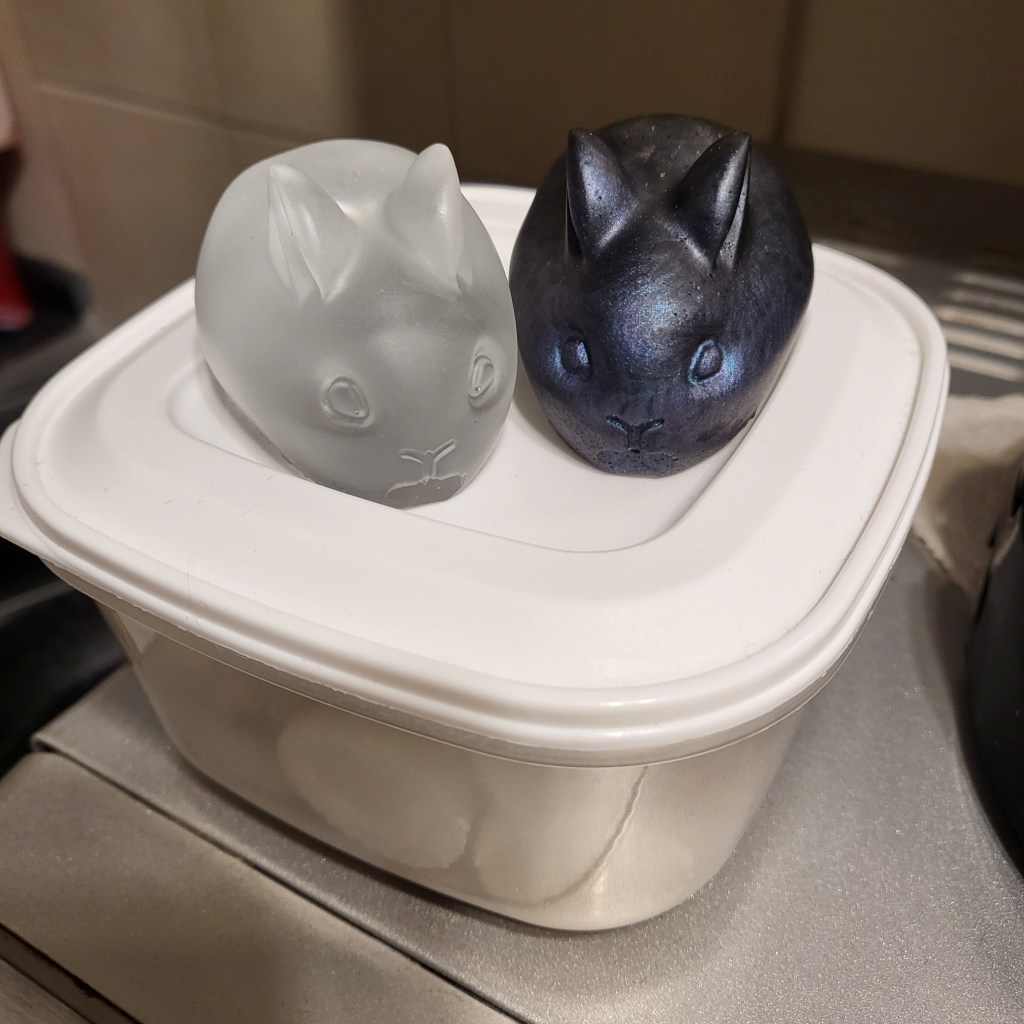
P.s. I have a little bonus pic for you – some cuddle bunnies 💜